Complete Indoor Hydroponic Grow System: Your Home Comfort
Introduction
If you’re passionate about gardening but lack the outdoor space, an indoor hydroponic grow system might be the perfect solution. A complete indoor hydroponic grow system allows you to grow fresh produce year-round, right in the comfort of your home. Let’s dive into the essentials of setting up and maintaining a thriving hydroponic garden.
What is Hydroponics?
Hydroponics is a method of growing plants without soil, using nutrient-rich water instead. This technique can be more efficient and produce higher yields than traditional soil gardening. There are several types of hydroponic systems, each with unique advantages:
1. Deep Water Culture (DWC): Plants are suspended in a nutrient solution, providing roots with continuous access to water and nutrients.
2. Nutrient Film Technique (NFT): A thin film of nutrient solution flows over the roots, ensuring constant nutrient availability and oxygenation.
3. Aeroponics: Roots are misted with a nutrient solution, maximizing oxygen exposure and promoting rapid growth.
4. Drip Systems: Nutrient solution is dripped onto the plant roots at regular intervals, suitable for a wide range of plants.
5. Wick Systems: Nutrient solution is drawn up through a wick, making this a simple and passive system ideal for beginners.
Why Choose an Indoor Hydroponic Grow System?
Year-round Gardening
1. Seasonal Independence: Grow fresh produce regardless of the season or weather conditions outside.
2. Consistent Yields: Maintain a steady supply of vegetables and herbs throughout the year.
3. Control Over Growing Conditions: Adjust lighting, temperature, and humidity to create the perfect environment for your plants.
4. Freshness Guaranteed: Harvest crops at their peak for maximum flavor and nutrition.
5. Extended Growing Seasons: Experiment with plants that may not thrive in your outdoor climate.
Space Efficiency
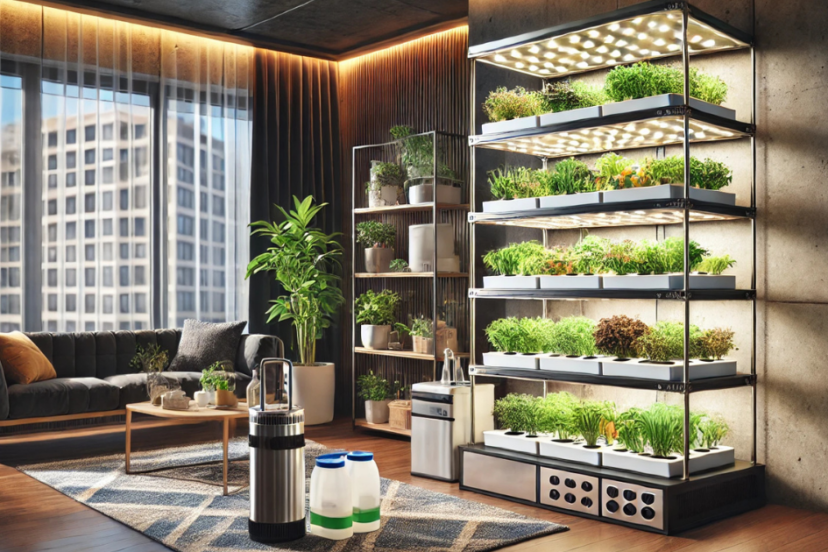
1. Vertical Gardening: Utilize vertical space with stackable or tiered hydroponic systems.
2. Compact Designs: Many hydroponic systems are designed to fit in small apartments or limited spaces.
3. Modular Systems: Expand your garden as needed with additional units or components.
4. No Soil Mess: Indoor hydroponics eliminates the need for bulky soil, keeping your space clean and organized.
5. Aesthetic Appeal: Modern hydroponic systems can be sleek and stylish, blending seamlessly into your home decor.
Pest and Disease Control
1. Indoor Environment: Reduce exposure to outdoor pests and diseases.
2. Clean Growing Medium: Use sterile grow media to minimize the risk of pathogens.
3. Controlled Access: Limit plant exposure to potential contaminants by controlling who and what enters the grow area.
4. Regular Monitoring: Spot and address issues early with frequent inspections.
5. Preventative Measures: Implement physical barriers, such as screens, to keep pests out.
Components of a Complete Indoor Hydroponic Grow System
Grow Lights
1. LED Lights: Energy-efficient and customizable to different plant growth stages.
2. Fluorescent Lights: Affordable and suitable for small-scale setups.
3. High-Intensity Discharge (HID) Lights: Provide intense light, ideal for larger systems and fruiting plants.
4. Full Spectrum Lights: Mimic natural sunlight, supporting all stages of plant growth.
5. Light Timers: Automate light cycles to ensure consistent exposure.
Nutrient Solutions
1. Balanced Nutrient Mixes: Use pre-formulated solutions tailored for hydroponics.
2. Custom Blends: Adjust nutrient ratios based on specific plant needs and growth stages.
3. Nutrient Concentrates: Convenient for storage and mixing.
4. Organic Nutrients: Opt for organic solutions if you prefer natural gardening practices.
5. Supplementary Nutrients: Add micronutrients or boosters for specific deficiencies or growth spurts.
Grow Media
1. Rockwool: Retains water and provides excellent support for roots.
2. Clay Pellets: Lightweight and reusable, offering good aeration and drainage.
3. Coco Coir: Sustainable and retains moisture well, promoting healthy root development.
4. Perlite: Enhances aeration and prevents waterlogging.
5. Vermiculite: Excellent for retaining moisture and nutrients.
Water and Air Pumps
1. Submersible Water Pumps: Efficiently circulate nutrient solutions in larger systems.
2. Air Pumps: Oxygenate the nutrient solution, preventing root rot and promoting healthy growth.
3. Timers: Automate pump cycles to ensure consistent watering and aeration.
4. Backup Systems: Install backup pumps to prevent system failure during power outages.
5. Maintenance Kits: Keep spare parts and tools on hand for quick repairs.
Setting Up Your Indoor Hydroponic System
Choosing the Right Location
1. Ample Space: Ensure enough room for your system and plants to grow.
2. Access to Electricity and Water: Convenient access is crucial for setting up and maintaining your system.
3. Controlled Environment: Choose a spot where you can control temperature and humidity.
4. Away from Direct Sunlight: Prevent overheating by keeping your system out of direct sunlight.
5. Ventilation: Ensure good airflow to prevent mold and mildew buildup.
Assembling the Equipment
1. Follow Instructions: Carefully read and follow the manufacturer’s assembly instructions.
2. Secure Connections: Ensure all parts are securely connected to prevent leaks.
3. Test the System: Run the system without plants to check for any issues.
4. Adjust Lighting: Position grow lights at the correct height for your plants.
5. Set Up Timers: Program light and pump timers for automated operation.
Preparing the Nutrient Solution
1. Use Clean Water: Start with filtered or distilled water to avoid contaminants.
2. Mix Thoroughly: Follow the instructions on the nutrient solution packaging to ensure proper mixing.
3. Check pH Levels: Use a pH meter to adjust the solution to the optimal range (5.5-6.5).
4. Monitor EC Levels: Use an EC meter to ensure the nutrient concentration is appropriate for your plants.
5. Store Safely: Keep nutrient solutions in a cool, dark place to maintain their effectiveness.
Selecting Plants for Your Hydroponic System
Best Plants for Beginners
1. Lettuce: Fast-growing and forgiving, perfect for hydroponic beginners.
2. Spinach: Easy to grow and highly nutritious.
3. Basil: Thrives in hydroponic systems and adds flavor to many dishes.
4. Mint: Rapid grower that’s difficult to kill, even for novices.
5. Kale: Hardy and productive, offering a continuous harvest.
Advanced Plant Choices
1. Tomatoes: Require more attention and support but reward with abundant yields.
2. Peppers: Need specific light and nutrient conditions but offer high productivity.
3. Strawberries: Delicate but rewarding with proper care and environment.
4. Cucumbers: Need ample space and support but can produce heavily.
5. Herbs like Rosemary and Thyme: Require precise conditions but are highly aromatic and flavorful.
Companion Planting Tips
1. Basil with Tomatoes: Enhances the flavor and growth of tomatoes.
2. Lettuce with Radishes: Radishes mature quickly and can be harvested before lettuce needs more space.
3. Mint with Cabbage: Deters pests that commonly affect cabbage.
4. Cucumbers with Beans: Beans provide nitrogen, benefiting cucumber growth.
5. Carrots with Onions: Onions repel carrot flies, protecting your carrot crop.
Nutrient Management
Understanding Plant Nutrient Needs
1. Macronutrients: Ensure plants get enough nitrogen (N), phosphorus (P), and potassium (K).
2. Micronutrients: Supply essential elements like iron, magnesium, and calcium.
3. Growth Stages: Adjust nutrient ratios for vegetative and flowering stages.
4. Monitor Signs: Watch for yellowing leaves or stunted growth as signs of nutrient deficiencies.
5. Regular Testing: Use nutrient solution test kits to keep track of levels and make adjustments.
Mixing and Monitoring Nutrient Solutions
1. Accurate Measurements: Use precise measuring tools for nutrient mixing.
2. Consistent Mixing: Stir solutions thoroughly to ensure even nutrient distribution.
3. Regular Testing: Test nutrient solution regularly to maintain optimal levels.
4. Top-Up Solutions: Replace lost water with pre-mixed nutrient solution rather than plain water.
5. Adjust for Plant Needs: Tailor nutrient concentrations
to meet the specific needs of different plants as they grow.
Adjusting pH Levels
1. pH Testing: Use a reliable pH meter to frequently check the pH level of your nutrient solution.
2. Adjusting pH: Use pH up or pH down solutions to keep the pH within the optimal range (5.5-6.5).
3. Consistency: Aim for stable pH levels to avoid plant stress.
4. Calibrate Equipment: Regularly calibrate your pH meter for accurate readings.
5. Buffer Solutions: Consider using pH buffer solutions to stabilize pH fluctuations.
Lighting Requirements
Types of Grow Lights
1. LED Grow Lights: Efficient and customizable, suitable for various growth stages.
2. Fluorescent Grow Lights: Cost-effective and ideal for small-scale or beginner setups.
3. High-Intensity Discharge (HID) Lights: Powerful and effective for large systems and fruiting plants.
4. Full Spectrum Lights: Provide a broad light spectrum that mimics natural sunlight.
5. Compact Fluorescent Lights (CFLs): Good for small spaces and low-energy use.
Light Schedules for Different Plants
1. Vegetative Stage: Provide 16-18 hours of light per day to encourage leafy growth.
2. Flowering Stage: Reduce to 12 hours of light per day to stimulate flowering and fruiting.
3. Herbs: Most herbs require around 14-16 hours of light daily.
4. Leafy Greens: Generally thrive with 12-16 hours of light.
5. Root Vegetables: Adapt light schedules based on the specific type of root vegetable.
Positioning Lights for Optimal Growth
1. Distance from Plants: Keep lights at an appropriate distance to avoid burning but ensure sufficient light reaches the plants.
2. Adjustable Fixtures: Use adjustable light fixtures to change height as plants grow.
3. Uniform Coverage: Position lights to provide even coverage across all plants.
4. Reflective Surfaces: Use reflective materials around your grow area to maximize light efficiency.
5. Supplemental Lighting: Add extra lights if necessary to ensure all plants receive adequate light.
Watering and Maintenance
Water Quality and Temperature
1. Filtered Water: Use filtered or distilled water to avoid impurities that can harm plants.
2. Ideal Temperature: Maintain water temperature between 65-75°F for optimal plant health.
3. Regular Changes: Change the nutrient solution regularly to prevent stagnation and nutrient depletion.
4. Aeration: Ensure good oxygen levels in the water to support healthy root growth.
5. Monitoring: Use water quality test kits to check for contaminants and ensure balanced nutrient levels.
Scheduling Water Cycles
1. Automated Timers: Use timers to automate watering cycles for consistency.
2. Plant-Specific Needs: Adjust watering schedules based on the specific needs of your plants.
3. Avoid Overwatering: Ensure cycles are not too frequent to prevent root rot.
4. Manual Checks: Periodically check the system manually to ensure everything is functioning properly.
5. Seasonal Adjustments: Modify watering schedules based on seasonal changes in temperature and humidity.
Maintaining Pumps and Reservoirs
1. Regular Cleaning: Clean pumps and reservoirs regularly to prevent clogs and algae buildup.
2. Inspect for Wear: Check pumps and tubing for signs of wear and tear, replacing parts as needed.
3. Backup Systems: Have backup pumps on hand in case of failure.
4. Proper Storage: Store equipment in a clean, dry place when not in use.
5. Preventive Maintenance: Perform routine checks and maintenance to catch potential issues early.
Managing Pests and Diseases
Common Hydroponic Pests
1. Aphids: Small, sap-sucking insects that can weaken plants.
2. Spider Mites: Tiny arachnids that cause stippling on leaves.
3. Whiteflies: Small, white insects that can spread diseases.
4. Fungus Gnats: Larvae can damage roots and stunt plant growth.
5. Thrips: Tiny insects that feed on plant tissues and spread diseases.
Preventative Measures
1. Cleanliness: Maintain a clean growing area to prevent pest infestations.
2. Quarantine New Plants: Isolate new plants before introducing them to your system.
3. Regular Inspections: Frequently check plants for early signs of pests or disease.
4. Proper Ventilation: Ensure good airflow to prevent mold and mildew.
5. Pest Screens: Install screens to keep pests out of the grow area.
Organic Pest Control Solutions
1. Neem Oil: Natural pesticide effective against a wide range of pests.
2. Insecticidal Soap: Safe and effective for controlling soft-bodied insects.
3. Diatomaceous Earth: Natural powder that damages insect exoskeletons.
4. Beneficial Insects: Introduce predators like ladybugs and predatory mites.
5. Essential Oils: Use oils like peppermint or eucalyptus as natural repellents.
Harvesting Your Hydroponic Crops
Signs of Readiness for Harvest
1. Mature Leaves: Harvest leafy greens when leaves are fully developed.
2. Fruit Ripeness: Pick fruits when they reach full color and size.
3. Aromatic Herbs: Harvest herbs when their fragrance is most potent.
4. Root Vegetables: Harvest root crops when they reach the desired size.
5. Flowering Plants: Harvest flowers when buds are fully formed and fragrant.
Best Harvesting Practices
1. Clean Tools: Use clean, sharp tools to avoid spreading diseases.
2. Gentle Handling: Handle plants gently to prevent damage.
3. Timing: Harvest in the morning when plants are most hydrated.
4. Regular Harvesting: Harvest regularly to encourage continuous growth.
5. Storage Preparation: Prepare storage containers or drying racks before harvesting.
Post-Harvest Care and Storage
1. Immediate Processing: Process and store crops immediately to preserve freshness.
2. Proper Storage Conditions: Store in cool, dark places to prolong shelf life.
3. Drying: Dry herbs and flowers properly to prevent mold.
4. Refrigeration: Use refrigeration for perishable crops.
5. Labeling: Label stored crops with harvest dates for efficient use.
Troubleshooting Common Problems
Identifying Nutrient Deficiencies
1. Yellowing Leaves: Often a sign of nitrogen deficiency.
2. Purple Leaves: Can indicate a phosphorus deficiency.
3. Stunted Growth: May be caused by potassium deficiency.
4. Interveinal Chlorosis: Typically a sign of magnesium deficiency.
5. Brittle Leaves: Can indicate calcium deficiency.
Managing Algae Growth
1. Light Control: Keep light out of nutrient reservoirs to prevent algae growth.
2. Regular Cleaning: Clean reservoirs and tubing to remove algae buildup.
3. Beneficial Bacteria: Introduce beneficial bacteria to outcompete algae.
4. Water Movement: Ensure good water circulation to prevent stagnation.
5. Cover Reservoirs: Use opaque covers to block light and discourage algae.
Dealing with Root Rot
1. Oxygenation: Ensure good oxygen levels in the nutrient solution.
2. Proper Watering: Avoid overwatering to prevent soggy roots.
3. Hydrogen Peroxide: Use diluted hydrogen peroxide to treat root rot.
4. Root Inspections: Regularly inspect roots for early signs of rot.
5. Sterilization: Sterilize equipment to prevent the spread of pathogens.
Reviews of Popular Indoor Hydroponic Systems
Overview of Top-Rated Systems
1. AeroGarden: User-friendly and ideal for beginners.
2. Hydrofarm: Versatile and suitable for a wide range of plants.
3. AC Infinity Advance Grow System: Premium option with advanced features.
4. Tower Garden: Vertical system perfect for small spaces.
5. Click and Grow: Automated and easy to use.
Pros and Cons of Each System
1. AeroGarden
– Pros: Easy setup, integrated lighting, beginner-friendly.
– Cons: Limited plant capacity, relatively high cost.
2. Hydrofarm:
– Pros: Flexible system, suitable for various plant types.
– Cons: Requires more manual adjustments.
3. AC Infinity Advance Grow System:
– Pros: High-tech features, large growing capacity.
– Cons: Expensive, complex setup.
4. Tower Garden
– Pros: Space-efficient, good for leafy greens.
– Cons: Limited to certain plant types.
5. Click and Grow
– Pros: Fully automated, minimal maintenance.
– Cons: Smaller capacity, proprietary pods.
Personal Recommendations
1. Best for Beginners: AeroGarden for its ease of use and integrated features.
2. Best for Advanced Growers: SuperCloset for its advanced technology and large capacity.
3. Best for Small Spaces: Tower Garden for its vertical design and efficiency.
4. Best for Versatility: Hydrofarm for its adaptability to different plant types.
5. Best for Automation: Click and Grow for its hands-off approach and convenience.
Customer Ratings and Feedback
1. AeroGarden: Rated highly for ease of use, with many users praising its beginner-friendly setup and reliable growth results.
2. Hydrofarm: Users appreciate its versatility and ability to accommodate various plants, though some note the need for more frequent adjustments.
3. SuperCloset: Reviews highlight its advanced features and large growing capacity, but the high cost and complex setup are common drawbacks.
4. Tower Garden: Customers enjoy the space-saving design and efficient use of vertical space, but some limitations on plant types are noted.
5. Click and Grow: Praised for its automation and low maintenance, though the proprietary pods can be a limiting factor for some users.
Cost and Investment
Initial Setup Costs
1. Basic Systems: Expect to spend around $100-$300 for a simple, beginner-friendly system.
2. Intermediate Systems: Mid-range systems typically cost between $300-$700, offering more features and capacity.
3. Advanced Systems: High-end systems can range from $700 to over $2000, with advanced technology and larger capacities.
4. Grow Lights: Quality grow lights can range from $50 to $500 depending on type and specifications.
5. Additional Equipment: Consider extra costs for pumps, timers, pH meters, and other essential accessories.
Ongoing Costs
1. Nutrient Solutions: Regular replenishment of nutrient solutions can cost $20-$50 per month depending on system size.
2. Electricity: Grow lights and pumps will increase your electricity bill, typically adding $10-$50 per month.
3. Water Usage: Hydroponic systems use water efficiently, but there will be some increase in water usage.
4. Replacement Parts: Budget for occasional replacement of parts like pumps and bulbs, costing $50-$100 annually.
5. Plant Seeds/Pods: Regular purchase of seeds or proprietary pods will be an ongoing cost, ranging from $5-$50 per month.
Return on Investment (ROI)
1. Fresh Produce: Growing your own vegetables and herbs can save money on grocery bills.
2. Quality Control: Enjoy higher quality, pesticide-free produce.
3. Learning Experience: Gain valuable gardening skills and knowledge.
4. Health Benefits: Benefit from fresh, nutrient-rich food.
5. Sustainability: Reduce your environmental footprint by growing your own food.
Maximizing ROI
1. Grow High-Value Crops: Focus on growing expensive or hard-to-find vegetables and herbs.
2. Efficient Systems: Invest in energy-efficient equipment to reduce ongoing costs.
3. DIY Solutions: Build or modify your own hydroponic systems to save on setup costs.
4. Bulk Purchases: Buy nutrients and supplies in bulk to reduce costs.
5. Continual Harvesting: Practice succession planting to maximize yields and efficiency.
Conclusion
Creating a complete indoor hydroponic grow system is an exciting and rewarding endeavor. With the right setup, careful planning, and diligent maintenance, you can enjoy fresh, homegrown produce year-round. Whether you’re a beginner or an experienced gardener, hydroponics offers a sustainable and efficient way to cultivate a wide variety of plants in your own home.
FAQs
What is the best hydroponic system for beginners?
The AeroGarden is highly recommended for beginners due to its user-friendly setup, integrated lighting, and reliable results. It’s designed to be easy to use, making it a great starting point for those new to hydroponics.
How often should I change the nutrient solution in my hydroponic system?
It’s generally recommended to change the nutrient solution every two to three weeks. Regularly changing the solution helps prevent nutrient imbalances and buildup of harmful pathogens.
Can I grow root vegetables in an indoor hydroponic system?
Yes, root vegetables like carrots and radishes can be grown hydroponically. However, they may require specific types of systems, such as deep water culture or aeroponics, to accommodate their growth habits.
What type of lighting is best for hydroponic systems?
LED grow lights are often considered the best option due to their energy efficiency, customizable light spectrums, and long lifespan. They are suitable for all stages of plant growth and provide consistent light quality.
How can I prevent pests in my indoor hydroponic garden?
Maintaining a clean growing environment, using sterile grow media, and regularly inspecting plants can help prevent pests. Implementing preventative measures such as physical barriers and organic pest control solutions can also reduce the risk of infestations.
*We may earn a commission from purchases made through our links, at no cost to you. This does not affect our product recommendations. Please see our disclosure to learn more.


