A Beginner’s Guide to Dutch Bucket Hydroponics
The Rise of Hydroponics
In recent years, hydroponics has gained immense popularity as a sustainable and efficient method of growing plants. This soilless cultivation technique allows for controlled environments, leading to faster growth rates and higher yields. It’s especially beneficial in urban areas where traditional gardening space is limited.
What Is Dutch Bucket Hydroponics?
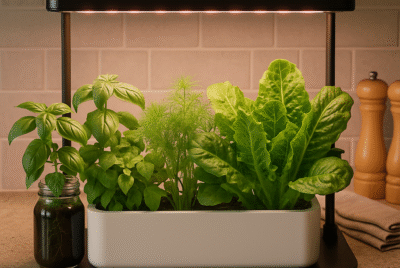
Dutch bucket hydroponics, also known as the “bato bucket” system, is a versatile and efficient hydroponic method. It utilizes individual buckets, typically filled with a soilless medium, and connected to a central reservoir that supplies nutrient-rich water. This setup makes it ideal for growing larger plants such as tomatoes, peppers, and cucumbers.
Why Choose Dutch Bucket System?
The Dutch bucket system is favored for its simplicity, scalability, and effectiveness. Whether you’re a beginner or an experienced gardener, this system offers several benefits:
1. Versatility: Suitable for various plant sizes and types.
2. Scalability: Easily expandable as you gain experience or desire to increase production.
3. Water Efficiency: Recirculating systems reduce water usage compared to traditional soil gardening.
4. Reduced Pests and Diseases: Controlled environments and soilless media reduce common garden pests and diseases.
5. Space Efficiency: Perfect for small spaces, including indoor environments.
Getting Started with Dutch Bucket Hydroponics
Understanding the Basics
Before diving into Dutch bucket hydroponics, it’s crucial to understand the fundamental principles. This system revolves around a few key components:
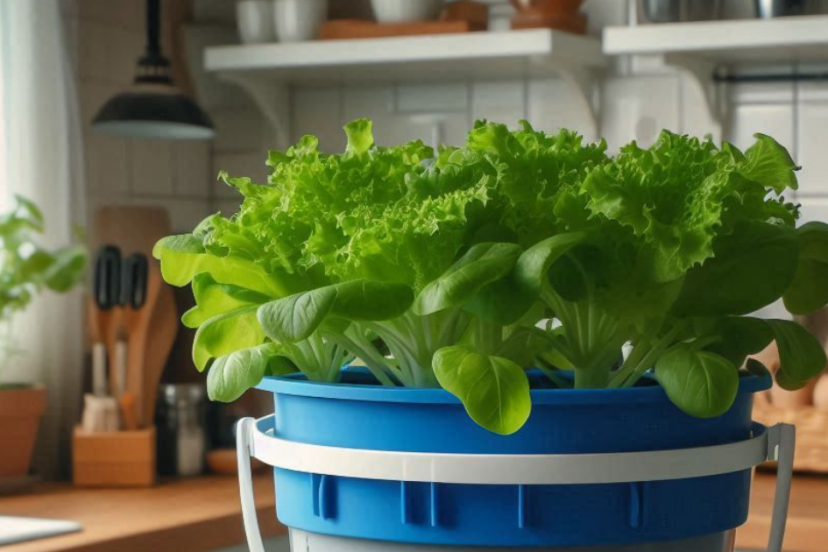
1. Buckets: Typically, 2-5 gallon buckets with drainage holes.
2. Growing Medium: Inert materials like perlite, vermiculite, or hydroton.
3. Nutrient Solution: A mix of water and essential nutrients.
4. Water Pump and Reservoir: To circulate the nutrient solution.
5. Support Structure: For climbing or heavy plants.
Each component plays a critical role in ensuring the health and productivity of your plants.
Essential Equipment and Materials
To set up a Dutch bucket hydroponic system, you’ll need:
1. Buckets: Choose buckets that are UV-resistant and food-safe. They should be easy to clean and maintain.
2. Growing Medium: Select a medium that provides good aeration and drainage. Options like perlite are lightweight and affordable.
3. Nutrient Solutions: Purchase or mix your own nutrient solutions tailored to the plants you’re growing.
4. Water Pump: A submersible pump appropriate for the size of your system.
5. Tubing and Connectors: For efficient water flow and nutrient distribution.
Additionally, consider acquiring pH and EC meters to monitor the nutrient solution’s quality.
Choosing the Right Plants
Selecting the right plants is crucial for a successful Dutch bucket hydroponic system. Consider these tips:
1. Plant Size: Ensure your chosen plants fit the space and support structure.
2. Growth Rate: Fast-growing plants can make better use of hydroponic advantages.
3. Nutrient Requirements: Some plants may have specific nutrient needs that require adjustments to your system.
4. Light Requirements: Ensure you have adequate lighting for indoor systems or the right location for outdoor systems.
5. Pest Resistance: Choose plants that are naturally resistant to pests, reducing the need for pesticides.
Some popular choices for Dutch bucket systems include tomatoes, peppers, cucumbers, and beans.
Setting Up Your Dutch Bucket System
Selecting the Right Location
Choosing the right location is fundamental for the success of your hydroponic system. Consider the following:
1. Light Availability: Ensure sufficient natural or artificial light. Plants need at least 12-16 hours of light daily.
2. Temperature Control: Maintain an optimal temperature range (typically 65-75°F for most plants).
3. Space: Allocate enough space for the system setup and plant growth. Consider vertical space for climbing plants.
4. Ventilation: Good air circulation prevents mold and mildew. Use fans if necessary.
5. Access to Utilities: Easy access to water and electricity for pumps and lighting.
Whether setting up indoors or outdoors, these factors are crucial for creating an optimal growing environment.
Assembling the Buckets
The assembly process involves several key steps:
1. Bucket Preparation: Drill drainage holes near the bottom. Ensure all buckets are consistent in setup.
2. Plumbing Setup: Install tubing for nutrient delivery and drainage. Ensure a slight incline for proper drainage.
3. Growing Medium: Fill buckets with your chosen medium. Pre-wet the medium to prevent floating.
4. Reservoir and Pump: Set up the reservoir below the bucket level. Connect the pump and tubing to circulate the nutrient solution.
5. Support Structures: Install trellises or stakes for supporting tall or vine plants.
Each step requires careful consideration to ensure efficient nutrient delivery and drainage.
Nutrient Solutions
Nutrient management is a critical aspect of hydroponics:
1. Choosing Nutrients: Select a balanced nutrient mix appropriate for your plants. Hydroponic-specific formulas are recommended.
2. Mixing Solutions: Follow the manufacturer’s guidelines for diluting nutrients. Use clean, chlorine-free water.
3. pH Monitoring: Maintain a pH level of 5.5-6.5, which is optimal for most hydroponic plants.
4. EC Monitoring: Regularly check the Electrical Conductivity (EC) to ensure nutrient concentration is within the ideal range.
5. Solution Replacement: Change the nutrient solution every 1-2 weeks to prevent nutrient imbalances and buildup of harmful salts.
Proper nutrient management ensures healthy plant growth and maximizes yields.
Planting and Maintenance: Dutch Bucket Hydroponics
Transplanting Seedlings
Transplanting seedlings into your Dutch bucket system requires care:
1. Seedling Preparation: Ensure seedlings are healthy and have a well-developed root system.
2. Transplant Timing: Transplant when seedlings have at least two sets of true leaves.
3. Handling Roots: Gently handle roots to prevent damage. Avoid transplant shock by hardening off seedlings if transitioning from a different environment.
4. Plant Spacing: Maintain adequate spacing for air circulation and growth. This prevents disease spread and encourages robust growth.
5. Initial Watering: Water immediately after transplanting to settle the medium and eliminate air pockets.
Watering and Nutrient Scheduling
Effective water and nutrient management are essential:
1. Watering Schedule: Adjust based on plant needs and growth stage. Younger plants require more frequent watering.
2. Nutrient Schedule: Follow a regular feeding schedule. Adjust nutrient concentration as plants grow.
3. System Flushing: Periodically flush the system with plain water to prevent salt buildup.
4. Monitoring: Regularly check for signs of nutrient deficiencies or excesses (e.g., yellowing leaves or burnt tips).
5. Record Keeping: Keep a log of watering, feeding, and pH/EC levels to track plant health and growth patterns.
Pruning and Training Plants
Proper pruning and training enhance plant productivity:
1. Pruning: Remove dead or diseased foliage to prevent disease spread. Trim excess growth to improve air circulation.
2. Training: Use trellises or stakes to support plants and guide growth. This is particularly important for vining plants like tomatoes and cucumbers.
3. Topping and Pinching: Techniques like topping can encourage bushier growth, while pinching can remove unwanted shoots.
4. Spacing Management: Regularly adjust plant spacing as they grow to prevent overcrowding.
5. Fruit Thinning: Thin out fruits to ensure better quality and size, particularly in high-yielding plants.
Pest and Disease Control
Maintaining a pest and disease-free environment is crucial:
1. Regular Inspections: Check plants frequently for signs of pests or disease. Early detection is key to effective management.
2. Natural Predators: Introduce beneficial insects like ladybugs or predatory mites to control pests.
3. Organic Pesticides: Use organic or homemade solutions for pest control when necessary.
4. Disease Management: Implement good hygiene practices like cleaning tools and removing infected plant parts.
5. Environmental Control: Maintain optimal humidity and temperature to reduce the likelihood of fungal diseases.
Advantages and Challenges
Pros of Dutch Bucket Hydroponics
Dutch bucket hydroponics offers numerous benefits, making it a popular choice among both novice and experienced gardeners:
1. Efficient Water Use: The recirculating nature of the system ensures minimal water waste, which is especially beneficial in arid regions or where water conservation is important.
2. Scalability: Whether you’re looking to grow a small herb garden or a large-scale vegetable operation, the Dutch bucket system can easily scale up or down to meet your needs. This flexibility allows for experimentation and expansion without significant additional costs.
3. Increased Yield and Growth Rate: Plants in hydroponic systems typically grow faster and yield more than those in traditional soil gardens. This is due to the controlled nutrient delivery and optimal growing conditions.
4. Pest and Disease Reduction: By growing plants in a soilless environment, you minimize the risk of soil-borne diseases and pests. This reduces the need for pesticides, making your garden more organic and environmentally friendly.
5. Space Efficiency: Dutch bucket systems can be set up in tight spaces, making them ideal for urban gardening or areas with limited outdoor space. Vertical setups can also maximize the use of available area.
Potential Challenges
While Dutch bucket hydroponics offers many advantages, it’s essential to be aware of the potential challenges:
1. Initial Setup Cost: The initial investment in equipment such as pumps, buckets, and growing media can be higher than traditional gardening methods. However, these costs are often offset by increased yields and lower water usage.
2. Technical Knowledge Required: Successful operation requires an understanding of pH and nutrient management. Newcomers may face a learning curve, but this can be mitigated with proper research and resources.
3. System Maintenance: Regular maintenance is crucial to prevent issues like nutrient imbalances, pump failures, and salt buildup. Neglect can lead to plant health problems and reduced yields.
4. Electrical Dependence: Most hydroponic systems, including Dutch buckets, rely on electricity to power pumps and lighting. Power outages can disrupt the system, potentially harming plants.
5. Risk of Root Rot: Inadequate drainage or overwatering can lead to root rot, a common problem in hydroponic systems. This can be managed with proper setup and monitoring.
Tips for Overcoming Common Challenges
1. Start Small: Begin with a few plants to learn the basics before scaling up. This approach reduces the risk and allows you to gain confidence and experience.
2. Invest in Quality Equipment: High-quality pumps, timers, and pH meters can prevent many common issues. Reliable equipment reduces the risk of system failures and provides more accurate readings.
3. Educate Yourself: Take advantage of online resources, forums, and books on hydroponics. Understanding the science behind nutrient solutions, plant physiology, and system mechanics will help you troubleshoot and optimize your setup.
4. Regular Monitoring and Maintenance: Set a schedule for checking pH, nutrient levels, and system components. Regular inspections can catch problems early, preventing major issues.
5. Backup Systems: Consider having a backup power source or manual watering system in case of power outages. This can protect your plants during unexpected disruptions.
Conclusion: Dutch Bucket Hydroponics
Dutch bucket hydroponics is a versatile and efficient method for growing a wide range of plants from leafy greens to growing tomatoes. Its benefits, including water efficiency, scalability, and increased yields, make it an attractive option for gardeners of all levels. While there are challenges, such as the need for technical knowledge and system maintenance, these can be managed with proper preparation and ongoing learning. By starting small and gradually expanding, you can enjoy the rewards of this innovative growing technique.
Whether you’re interested in growing your own food, exploring a sustainable hobby, or simply looking for a new gardening challenge, Dutch bucket hydroponics offers a fulfilling and productive way to cultivate plants. Embrace the learning process, and soon you’ll be harvesting the fruits (and vegetables) of your labor.
FAQs: Dutch Bucket Hydroponics
1. What is the ideal pH level for Dutch bucket systems?
The ideal pH level for most plants grown in Dutch bucket systems is between 5.5 and 6.5. This range allows for optimal nutrient uptake. Regularly monitoring and adjusting the pH is crucial to maintaining plant health.
2. How often should I change the nutrient solution?
It’s generally recommended to change the nutrient solution every 1-2 weeks. This helps prevent nutrient imbalances and the buildup of salts and other compounds that can affect plant growth. Fresh nutrient solution ensures that plants receive the proper nutrients they need at different growth stages.
3. Can I grow any type of plant using Dutch buckets?
While Dutch bucket systems are versatile, they are particularly well-suited for medium to large plants like tomatoes, cucumbers, peppers, and eggplants. Leafy greens and herbs can also be grown, but smaller plants may be more efficiently cultivated using other hydroponic methods like nutrient film technique (NFT) or deep water culture (DWC).
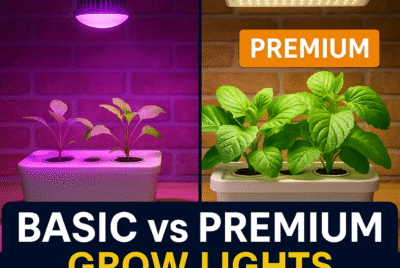
4. What are the best lighting options for indoor setups?
For indoor setups, LED grow lights are highly recommended due to their energy efficiency, low heat output, and adjustable spectrum. LED lights can be tailored to the specific growth stages of plants, providing blue light for vegetative growth and red light for flowering. High-Intensity Discharge (HID) lights, such as metal halide and high-pressure sodium, are also effective but generate more heat and consume more energy.
5. How do I prevent root rot in my Dutch bucket system?
Preventing root rot involves ensuring proper drainage, avoiding overwatering, and maintaining a clean growing environment. Use a well-aerated growing medium and ensure the drainage system is working correctly. Additionally, keeping the nutrient solution cool and oxygenated can help prevent the conditions that lead to root rot. Regular inspection of plant roots and prompt action if signs of rot appear are crucial for maintaining plant health.
*We may earn a commission from purchases made through our links, at no cost to you. This does not affect our product recommendations. Please see our disclosure to learn more.