Hydroponic Seed Starting – Learn to Grow Fast

Hydroponic seed starting is one of those gardening techniques that feels like a game-changer the moment you get into it. Imagine this: your plants growing faster, stronger, and healthier, all without a speck of soil. Sounds like magic, right? But it’s real, and it’s called hydroponics.
In this comprehensive guide, I’ll walk you through everything you need to know about hydroponic seed starting. Whether you’re a seasoned gardener looking to speed things up or a newbie curious about dipping your toes into hydroponics, this guide has got you covered. From choosing the right seeds to troubleshooting common problems, I’ll share tips and tricks to ensure your success.
What is Hydroponic Seed Starting?
Hydroponic seed starting is simply the process of germinating seeds and growing seedlings in a soilless medium using nutrient-rich water solutions. Unlike traditional gardening, where soil provides nutrients to plants, hydroponics allows for more direct and controlled nutrient delivery.
Definition and Explanation
In hydroponics, “hydro” means water, and “ponics” refers to labor. The term essentially means “working water.” When it comes to seed starting, hydroponics involves placing seeds in a medium like rock wool, coco coir, or even just water, then providing them with the right mix of nutrients, water, and light to encourage growth.
This method is highly efficient, allowing seeds to germinate faster because the nutrients are delivered directly to the plant roots, bypassing the soil. The roots don’t have to work as hard to find food, meaning the plants can focus more on growing.
How it Differs from Traditional Soil Starting
– Speed of Growth: In soil, seeds rely on the nutrients naturally available, and the roots must work harder to absorb these nutrients. In hydroponics, nutrients are delivered directly to the roots, which speeds up the germination process.
– Control Over Environment: With hydroponics, you control everything—light, water, nutrients, and temperature. This level of control is impossible in traditional soil gardening, where you’re at the mercy of the elements.
– Water Usage: Hydroponics uses less water than traditional gardening. In soil, a significant amount of water is lost due to evaporation or simply drains away without benefiting the plant. In hydroponics, water is recycled and used more efficiently.
– Pest and Disease Control: Soil can harbor pests and diseases, which are often the bane of gardeners. With hydroponics, you eliminate soil-borne problems, reducing the risk of diseases.
– Space Efficiency: Hydroponic systems are often more compact, making them ideal for small spaces. Vertical systems can even stack multiple layers of plants, optimizing your growing area.
Advantages of Hydroponic Seed Starting
When it comes to starting seeds, hydroponics offers several distinct advantages over traditional soil-based methods. Let’s dive into some of the top reasons why you might want to consider this method.
Faster Germination Rates
One of the biggest perks of hydroponic seed starting is the speed. Since nutrients are delivered directly to the plant roots in a controlled environment, seeds germinate faster than they would in soil. This can shave days or even weeks off your growing schedule, allowing you to start your garden earlier or enjoy more harvests throughout the year.
Five Recommendations:
1. Use a Heating Mat: To further speed up germination, consider using a heating mat under your seed trays. This keeps the water at an optimal temperature, encouraging quicker sprouting.
2. Opt for Fast-Germinating Seeds: Some seeds naturally germinate faster than others. Lettuce, for example, is a quick sprouter, making it an excellent choice for impatient gardeners.
3. Pre-Soak Seeds: Soaking seeds in water for a few hours before planting can help soften the seed coat, speeding up the germination process.
4. Maintain Consistent Nutrient Levels: Ensure that your nutrient solution is well-balanced and consistently available to the seeds. This will promote faster, more uniform germination.
5. Ensure Optimal Light Conditions: Seeds need light to grow. Make sure your grow lights are on for 14-16 hours a day to provide the right amount of light energy for quick growth.
Controlled Environment
Another significant advantage of hydroponic seed starting is the ability to control every aspect of the growing environment. You control the light, water, nutrients, and temperature, which means you can create the perfect conditions for your seeds to thrive.
Five Recommendations:
1. Monitor Temperature Carefully: Use a thermometer to regularly check the temperature of your grow room. The ideal temperature for most seeds is between 70°F and 80°F.
2. Use a Humidity Dome: Humidity is crucial for seed germination. A humidity dome can help keep moisture levels high, ensuring seeds don’t dry out.
3. Adjust Lighting Based on Seed Type: Different seeds require different amounts of light. Some may need intense light, while others might need a more shaded environment. Research your specific seeds and adjust accordingly.
4. Control Air Circulation: Good air circulation prevents mold and mildew from forming. Use small fans to keep the air moving around your seedlings.
5. Automate Watering and Nutrient Delivery: Consider using a timer for your hydroponic system to automate watering and nutrient delivery, ensuring your plants get what they need consistently.
Reduced Risk of Diseases
Soil can be a breeding ground for fungi, bacteria, and pests, all of which can harm your seedlings. By eliminating soil from the equation, you also eliminate a significant source of potential problems.
Five Recommendations:
1. Use Sterilized Equipment: Always start with sterilized trays, tools, and hydroponic systems to prevent the introduction of diseases.
2. Regularly Clean Your System: Even in a soilless environment, algae and other unwanted organisms can develop. Regular cleaning keeps your system disease-free.
3. Use Disease-Resistant Seeds: Some seed varieties are bred to be resistant to certain diseases. Opt for these when possible to further reduce the risk.
4. Monitor for Early Signs of Disease: Even in hydroponics, diseases can sometimes occur. Watch for any discoloration or wilting and address issues promptly.
5. Rotate Crops: If you’re growing multiple crops, rotating them can help reduce the risk of disease buildup in your hydroponic system.
Water Efficiency
Hydroponics uses water more efficiently than traditional soil-based methods. In soil, much of the water is lost through evaporation or drainage. In hydroponics, water is recycled and reused, which conserves resources.
Five Recommendations:
1. Invest in a Water Recycling System: A closed-loop hydroponic system recycles water, minimizing waste and ensuring plants always have access to what they need.
2. Use Rainwater: If possible, collect and use rainwater in your hydroponic system. It’s naturally soft and often contains fewer chemicals than tap water.
3. Monitor Water pH Levels: Keep an eye on your water’s pH levels to ensure nutrients are being absorbed properly
and efficiently by the plants. A pH level between 5.5 and 6.5 is ideal for most hydroponic setups.
4. Use Hydroponic-Specific Nutrients: These are designed to be more easily absorbed by plants in a soilless system, which can help reduce the amount of water needed to deliver nutrients effectively.
5. Implement Drip Irrigation: For more precise water usage, consider using a drip irrigation system in your hydroponic setup. This ensures that water is delivered directly to the plant roots, minimizing waste.
Getting Started with Hydroponic Seed Starting
If you’re new to hydroponic seed starting, you might be wondering where to begin. The good news is that setting up your first hydroponic system is easier than you might think, and it doesn’t require a significant investment.
Necessary Equipment and Materials
Before you get started, it’s important to gather all the necessary equipment and materials. The basic setup for hydroponic seed starting is relatively simple and can be customized based on your specific needs and budget.
Five Recommendations:
1. Start with a Simple Setup: If you’re just beginning, opt for a basic, small-scale hydroponic system that doesn’t overwhelm you. As you gain experience, you can always expand your setup.
2. Invest in Quality Equipment: While it’s tempting to go for the cheapest options, investing in quality trays, lights, and pumps will save you time and money in the long run.
3. Consider a Pre-Made Kit: For beginners, purchasing a pre-made hydroponic seed starting kit can simplify the process and ensure you have all the necessary components.
4. Use Transparent Seed Trays: Transparent trays allow you to monitor root development without disturbing the seedlings.
5. Keep a Grow Journal: Document your setup, germination times, and any issues you encounter. This will help you refine your approach over time.
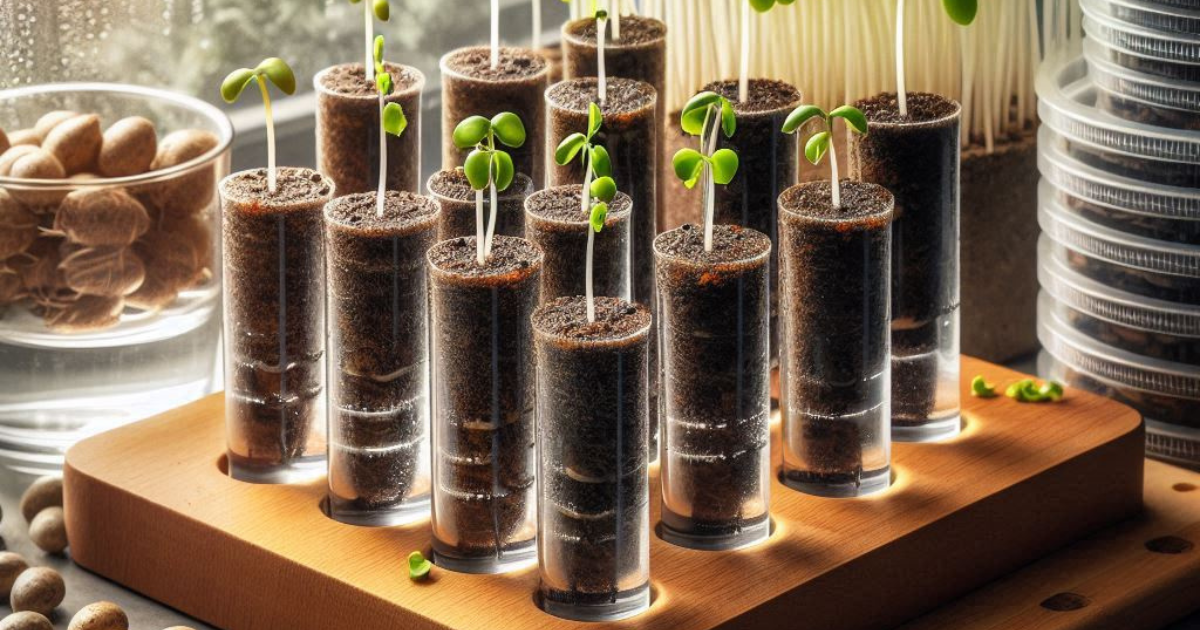
Seed Trays
Seed trays are an essential component of any hydroponic seed starting setup. They hold the growing medium and seeds, providing a stable environment for germination.
Five Recommendations:
1. Choose Reusable Trays: Look for sturdy, reusable seed trays that can withstand multiple growing cycles.
2. Opt for Modular Trays: Modular trays with individual cells make it easier to transplant seedlings without disturbing the roots.
3. Ensure Good Drainage: Seed trays should have adequate drainage holes to prevent water from pooling, which can lead to root rot.
4. Consider Self-Watering Trays: These trays have a water reservoir at the bottom, ensuring consistent moisture for your seedlings.
5. Sterilize Between Uses: Always sterilize your seed trays between uses to prevent the spread of diseases and pests.
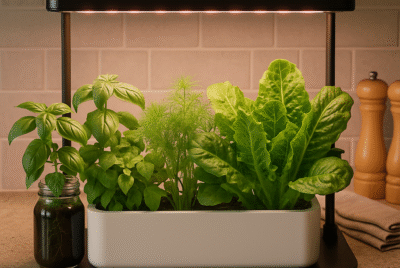
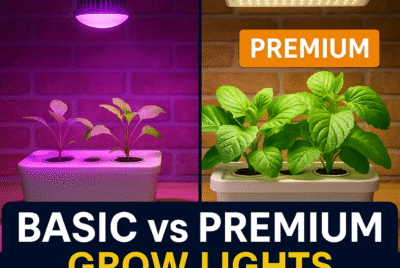
Grow Lights
Lighting is crucial in hydroponic seed starting, especially if you’re growing indoors where natural sunlight is limited. Proper lighting ensures that seedlings grow strong and healthy.
Five Recommendations:
1. Use Full-Spectrum LED Lights: Full-spectrum LEDs provide the right balance of light wavelengths that mimic natural sunlight, promoting healthy growth.
2. Adjust Light Height: Keep your grow lights about 2-4 inches above the seedlings to prevent them from becoming leggy. As they grow, adjust the height accordingly.
3. Consider Timers: To ensure your plants get the right amount of light, use a timer to automate the on/off cycles, typically 14-16 hours of light per day.
4. Use Reflective Surfaces: Place reflective materials, like Mylar or white surfaces, around your grow
space to maximize light efficiency. This ensures that the seedlings receive light from multiple angles, promoting even growth.
5. Monitor Light Intensity: Not all seedlings require the same light intensity. Use a light meter to measure the intensity and adjust accordingly, especially for sensitive plants.
Nutrient Solutions
Nutrient solutions are the lifeblood of your hydroponic system. Since there’s no soil to provide nutrients, these solutions must be perfectly balanced to ensure healthy plant growth.
Five Recommendations:
1. Use Hydroponic-Specific Nutrients: Unlike regular fertilizers, hydroponic nutrients are designed to be water-soluble and provide a balanced mix of essential elements directly to the plant roots.
2. Mix Nutrients Carefully: Always follow the manufacturer’s instructions when mixing your nutrient solution. Incorrect ratios can lead to nutrient burn or deficiencies.
3. Test Nutrient Strength (EC): Regularly check the electrical conductivity (EC) of your solution. This measures the nutrient concentration and ensures your plants are getting what they need without being overfed.
4. Change Nutrient Solutions Weekly: To prevent the buildup of salts and other residues, refresh your nutrient solution at least once a week.
5. Monitor for Nutrient Deficiencies: Watch for signs of nutrient deficiencies, such as yellowing leaves or stunted growth, and adjust your nutrient mix accordingly.
pH Test Kits
Maintaining the right pH level in your hydroponic system is crucial. pH affects how well your plants can absorb nutrients, and even small deviations can lead to problems.
Five Recommendations:
1. Use a Digital pH Meter: Digital pH meters are more accurate and easier to use than pH test strips, giving you precise readings.
2. Test pH Daily: To maintain optimal growing conditions, test your nutrient solution’s pH daily. The ideal range is typically between 5.5 and 6.5.
3. Adjust pH Gradually: If you need to adjust the pH, do so gradually to avoid shocking your plants. Use pH up or down solutions specifically designed for hydroponics.
4. Store pH Meters Properly: Keep your digital pH meter calibrated and store it with the electrode in storage solution to maintain accuracy.
5. Keep a Log of pH Levels: Record your pH levels regularly to identify any trends or issues that might need attention.
Choosing the Right Seeds
Not all seeds are well-suited for hydroponic growing, so choosing the right ones is crucial for success. The right seeds will germinate quickly and thrive in a soilless environment, while the wrong ones may struggle or fail to grow altogether.
Best Types of Seeds for Hydroponic Growing
Some plants naturally perform better in hydroponic systems than others. Leafy greens, herbs, and certain vegetables are particularly well-suited to hydroponics.
Five Recommendations:
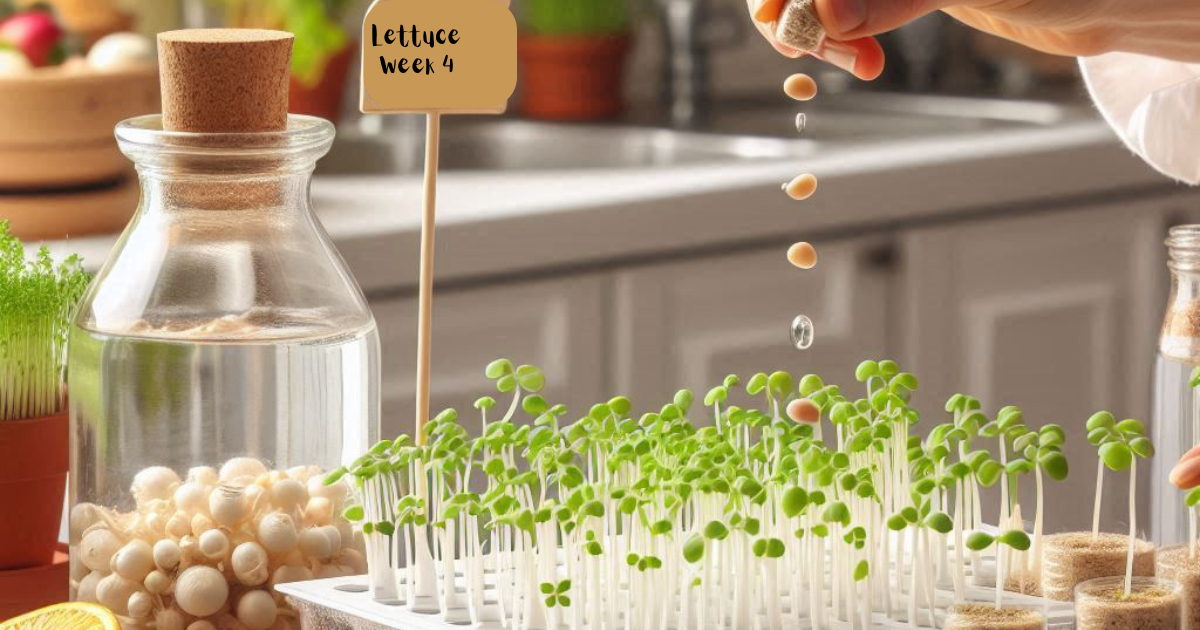
1. Start with Leafy Greens: Lettuce, spinach, and kale are among the easiest and most reliable seeds to start hydroponically. They germinate quickly and don’t require much space.
2. Try Herbs: Basil, cilantro, and parsley thrive in hydroponic systems and are perfect for beginners. They grow fast and have high market value if you’re considering selling your produce.
3. Consider Fast-Growing Vegetables: Radishes, cucumbers, and tomatoes are also excellent choices for hydroponic systems. They grow quickly and can be harvested multiple times.
4. Opt for Seed Varieties Labeled as “Hydroponic-Friendly”: Some seed companies offer varieties specifically bred for hydroponic systems. These seeds are optimized for soilless growth and often perform better in such environments.
5. Consider Starting with Microgreens: Microgreens are young vegetable greens that are easy to grow hydroponically and can be harvested within a few weeks. They’re a great way to get quick results and enjoy fresh greens year-round.
Seeds to Avoid when beginning
While many plants thrive in hydroponic systems, others can be more challenging or simply not suited for soilless environments.
Five Recommendations:
1. Avoid Root Vegetables: Potatoes, and beets are difficult to grow hydroponically because they require loose, deep soil to develop properly. They can be done, but it’s often not worth the effort for beginners.
2. Steer Clear of Long-Germinating Seeds: Some seeds, like certain fruit trees or perennials, take a long time to germinate and establish themselves. These are better suited for soil-based growing where time and space aren’t as limited.
3. Skip Tall, Heavy Plants: Corn or large sunflowers require a lot of space and support, which can be difficult to manage in a hydroponic system designed for seed starting.
4. Watch Out for Plants Requiring Specific Pollination: Some plants, like squash or cucumbers, require pollination, which can be tricky to manage indoors or in small spaces.
5. Be Cautious with Leggy or Viney Plants: Plants like beans or peas can become leggy and take up a lot of space, which might not be ideal in a confined hydroponic setup.
Step-by-Step Guide to Hydroponic Seed Starting
Now that you have all your equipment and seeds ready, it’s time to start planting. This step-by-step guide will walk you through the entire process from seed to seedling.
Preparing the Seed Tray
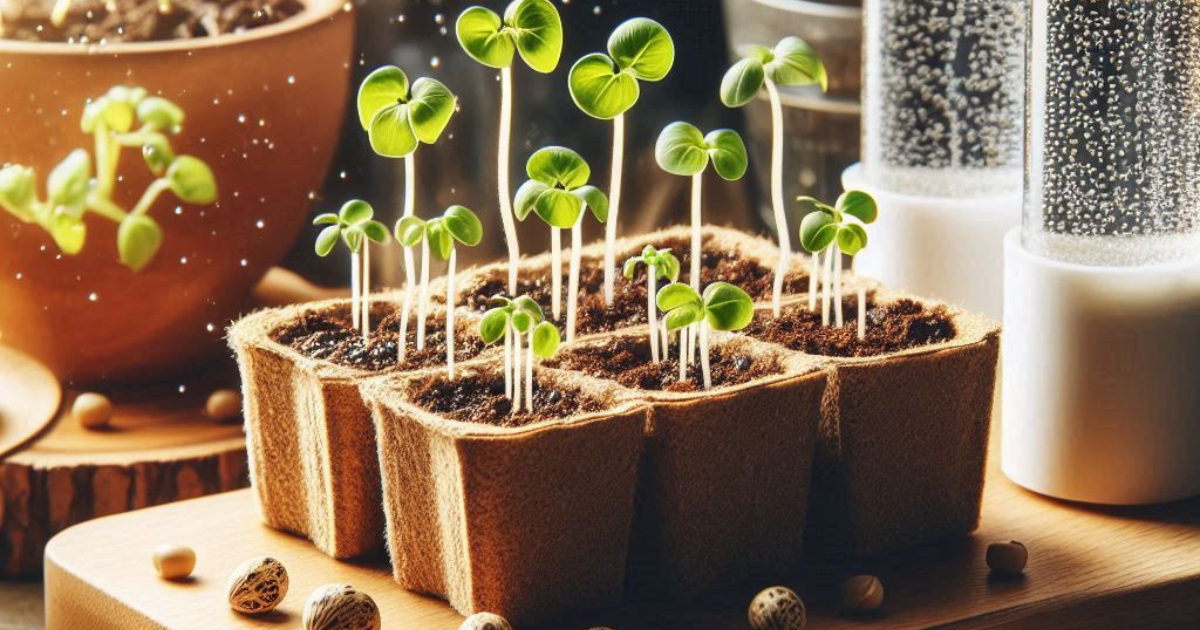
The first step in hydroponic seed starting is preparing your seed trays. Proper preparation ensures that your seeds have the best possible start.
Five Recommendations:
1. Choose the Right Medium: Common hydroponic growing media include rockwool, coconut coir, and perlite. Each has its pros and cons, so choose one based on your specific needs.
2. Pre-Soak the Growing Medium: Before placing seeds, soak your growing medium in pH-balanced water or a light nutrient solution to ensure it’s moist and ready for planting.
3. Fill Trays Evenly: Ensure that the growing medium is evenly distributed in your trays to provide a uniform environment for all seeds.
4. Label Each Tray: If you’re planting different types of seeds, label each tray or section to keep track of what’s growing where.
5. Test Tray Placement: Place your trays in your growing area to ensure they fit well under your lights and that you have easy access for watering and monitoring.
Adding Nutrient Solution
Nutrient solutions provide the essential elements that your seeds need to germinate and grow. Adding the right nutrient solution is crucial for the health of your seedlings.
Five Recommendations:
1. Start with a Weak Solution: When seeds are just starting, they don’t need a strong nutrient solution. Start with a diluted mix, about 25% of the full strength, to avoid burning the young roots.
2. Use a Hydroponic Nutrient Calculator: There are many online tools that help you calculate the exact amount of nutrients needed based on the type of plant, stage of growth, and system size.
3. Check pH After Mixing: After adding nutrients, always check and adjust the pH of the solution before using it on your seeds.
4. Distribute Evenly: Pour the nutrient solution evenly across the trays to ensure all seeds receive the same amount of nutrients.
5. Monitor Solution Levels: Keep an eye on the nutrient solution levels in your trays. Top off with pH-balanced water as needed to keep the growing medium consistently moist.
Placing the Seeds
With your trays and nutrient solution prepared, it’s time to plant your seeds.
Five Recommendations:
1. Plant at the Right Depth: As a general rule, plant seeds at a depth equal to two times the seed’s width. For very small seeds, a light dusting of the growing medium over the top is sufficient.
2. Space Seeds Evenly: Give each seed enough space to grow by spacing them according to the plant’s mature size. Crowding can lead to competition for nutrients and light.
3. Cover with a Humidity Dome: Once your seeds are in place, cover the trays with a humidity dome to maintain moisture and warmth, which are essential for germination.
4. Label Seeds: If you’re planting multiple types of seeds in the same tray, use markers to label each section clearly.
5. Keep Track of Planting Dates: Record the date you planted each type of seed to help monitor germination times and track growth progress.
Monitoring Growth
Once your seeds are planted, the real work begins. Monitoring and adjusting the conditions as your seeds grow is key to successful hydroponic seed starting.
Five Recommendations:
1. Check Daily for Germination: Most seeds will start to germinate within a few days to a week. Check them daily to monitor progress and make adjustments as needed.
2. Adjust Light as Needed: As seedlings emerge, move the grow lights closer to prevent them from becoming leggy. Keep lights on for 14-16 hours a day.
3. Maintain Humidity: While seeds are germinating, keep the humidity high by keeping the dome on. Once most seeds have sprouted, start removing the dome for a few hours each day to acclimate the seedlings.
4. Monitor for Pests: Although less common in hydroponics, pests can still be an issue. Keep an eye out for signs of insects or mold, and address issues promptly.
5. Gradually Increase Nutrients: As seedlings grow, you can gradually increase the nutrient concentration to support their development.
Transplanting the Seedlings
When your seedlings are strong enough, it’s time to transplant them into a larger hydroponic system or soil.
Five Recommendations:
1. Wait for True Leaves: Seedlings are ready to transplant when they have at least two sets of true leaves (the second set of leaves that appear after the initial seed leaves).
2. Handle Gently: When transplanting, handle seedlings by the leaves, not the stem, to avoid damaging the delicate plant.
3. Acclimate to New Conditions: If moving to a different environment, such as from indoors to outdoors, gradually acclimate the seedlings by increasing their exposure to the new conditions over a few days.
4. Prepare the New System: Ensure your new hydroponic system or soil is prepared with the correct nutrient levels and pH before transplanting.
5. Water After Transplanting: After moving the seedlings, water them with a diluted nutrient solution to help them adjust to their new environment.
Tips for Successful Hydroponic Seed Starting

Starting seeds hydroponically can be highly rewarding, but there are some best practices to keep in mind to maximize your success.
Maintaining the Right Temperature
Temperature plays a critical role in seed germination and seedling growth. Too hot or too cold, and your seeds might not germinate at all.
Five Recommendations:
1. Use a Heating Mat: If your growing space is cool, use a heating mat under the trays to maintain an optimal soil temperature of 70-80°F for most seeds.
2. Avoid Drafts: Place your growing area away from doors, windows, or vents that could cause temperature fluctuations.
3. Monitor Air Temperature: In addition to the growing medium, ensure the surrounding air is also within the ideal range for your plants.
4. Insulate Your Grow Area: If you’re growing in a garage or basement, consider insulating the area to help maintain a consistent temperature.
5. Adjust Based on Seed Type: Some seeds, like peppers and tomatoes, prefer slightly warmer temperatures for germination. Research your seeds’ specific needs and adjust accordingly.
Ensuring Proper Light Exposure
Light is crucial for healthy seedling development, and insufficient light is a common issue for indoor growers.
Five Recommendations:
1. Invest in Quality Grow Lights: Full-spectrum LEDs are ideal for seedlings as they provide the right balance of light wavelengths for growth.
2. Keep Lights Close: Position your lights 2-4 inches above the seedlings to prevent them from stretching. As the plants grow, adjust the light height accordingly.
3. Use a Light Timer: Automate your lights with a timer set to 14-16 hours per day to ensure consistent light exposure.
4. Rotate Trays: If some seedlings aren’t receiving as much light as others, rotate the trays every few days to ensure even exposure.
5. Supplement with Natural Light: If possible, place your hydroponic system near a window to supplement artificial light with natural sunlight.
Monitoring pH Levels
pH is one of the most critical factors in a hydroponic system, as it affects nutrient absorption and overall plant health.
Five Recommendations:
1. Test Daily: Regular pH testing, ideally daily, helps you catch and correct any imbalances before they cause issues.
2. Adjust pH Gradually: When adjusting pH, do so slowly to avoid shocking your plants. Small, incremental changes are better than drastic adjustments.
3. Use pH Up/Down Solutions: Invest in pH up and pH down solutions specifically designed for hydroponics to make accurate adjustments.
4. Record pH Levels: Keep a log of pH readings to track changes over time and identify any recurring issues.
5. Consider a Continuous pH Monitor: For more advanced setups, a continuous pH monitor provides real-time readings, making it easier to maintain the ideal range.
Managing Humidity
Humidity levels play a crucial role in seed germination and seedling health, especially in a hydroponic environment.
Five Recommendations:
1. Use a Humidity Dome: Cover your seed trays with a humidity dome to maintain a high level of moisture, which is essential for seed germination. Most seeds prefer a humidity level of 70-90% during this stage.
2. Monitor Humidity Levels: Use a hygrometer to monitor humidity in your growing area. Adjust as needed by removing or adding the dome, or using a humidifier.
3. Mist Regularly: If you notice the growing medium drying out, mist it lightly with water. This can be particularly important in low-humidity environments.
4. Ventilate Gradually: As seedlings start to grow, gradually introduce more air circulation by lifting the dome or opening vents. This helps prevent fungal growth and prepares the seedlings for life outside the dome.
5. Control Room Humidity: If your growing space is too dry, consider using a humidifier, especially during the germination phase. Conversely, a dehumidifier may be needed if the environment is too humid, which can lead to mold and mildew issues.
Dealing with Common Seedling Problems
Even with careful planning, issues can arise during hydroponic seed starting. Knowing how to address common problems can save your seedlings and keep your hydroponic garden on track.
Five Recommendations:
1. Leggy Seedlings: If your seedlings are tall and spindly, they are likely not getting enough light. Move the grow lights closer to the seedlings and ensure they’re receiving adequate light exposure.
2. Yellowing Leaves: Yellow leaves can indicate a nutrient deficiency, typically nitrogen. Check your nutrient solution’s strength and adjust the nutrient mix if needed.
3. Damping-Off Disease: This fungal disease causes seedlings to wilt and die. It’s often due to excessive moisture and poor air circulation. To prevent it, avoid overwatering, use a fan to increase air circulation, and ensure your growing medium is well-drained.
4. Root Rot: Root rot is caused by waterlogged growing medium and insufficient oxygen. Ensure your trays have good drainage, and consider adding an air stone to your water reservoir to increase oxygenation.
5. Pest Infestations: Although pests are less common in hydroponics, they can still be a problem. Use insecticidal soap or neem oil to treat common pests like aphids or spider mites. Keeping your growing area clean and inspecting plants regularly will help prevent infestations.
The Transition from Seedling to Mature Plant
Successfully germinating seeds is just the beginning. The next step is transitioning your seedlings into mature plants, which requires careful handling and an understanding of their needs as they grow.
Preparing for Transplant
Transplanting seedlings from their initial trays to a more permanent growing system is a delicate process. Proper preparation ensures that your plants continue to thrive after being moved.
Five Recommendations:
1. Harden Off Seedlings: Before transplanting, gradually acclimate your seedlings to their new environment by exposing them to it for a few hours each day over a week. This is especially important if moving them outdoors.
2. Water Before Transplanting: Water your seedlings thoroughly before transplanting to help reduce transplant shock.
3. Choose the Right Time: Transplant seedlings during the cooler parts of the day, such as early morning or late afternoon, to minimize stress.
4. Prepare the New Growing Medium: Whether you’re transplanting to another hydroponic system or soil, make sure the new growing medium is ready and properly conditioned with the right pH and nutrient levels.
5. Support Young Plants: If you’re transplanting larger seedlings, provide support such as stakes or ties to help them stand upright as they adjust to their new environment.
Setting Up the New Hydroponic System
When moving your seedlings to a larger hydroponic system, it’s important to ensure the new setup is optimized for their continued growth.
Five Recommendations:
1. Choose the Right System Type: Depending on your plants and space, choose a system like NFT (Nutrient Film Technique), DWC (Deep Water Culture), or a drip system. Each has its advantages, and the right choice depends on your specific needs.
2. Ensure Proper Spacing: When transplanting, provide enough space between plants to allow them to grow to their full potential without competition for light and nutrients.
3. Monitor Water Levels: In larger systems, maintaining consistent water levels is crucial. Ensure your water reservoir is large enough to accommodate the needs of all your plants.
4. Install an Aeration System: Adding an air pump and stone to your hydroponic setup increases oxygen levels in the water, which is beneficial for root health and overall plant growth.
5. Check for Leaks: Before placing seedlings in the new system, run it for a few hours to check for any leaks or issues with water circulation.
Post-Transplant Care
After transplanting, your seedlings will need special care to help them establish in their new environment. The first few days are critical for their survival and future growth.
Five Recommendations:
1. Water Immediately: After transplanting, water the seedlings with a mild nutrient solution to help them settle into their new growing medium.
2. Monitor for Transplant Shock: Look for signs of transplant shock, such as wilting or yellowing. If you notice these signs, provide extra care by reducing light intensity and keeping the growing environment stable.
3. Gradually Increase Light Exposure: Initially, reduce the intensity of light for the first few days after transplanting. Gradually increase light exposure as the seedlings begin to recover.
4. Maintain High Humidity: Keeping the humidity levels high for the first few days can help reduce stress on the plants. Consider misting them if the air is too dry.
5. Adjust Nutrient Strength: As your seedlings grow into mature plants, gradually increase the strength of your nutrient solution to meet their developing needs.
Advanced Tips for Hydroponic Seed Starting
Once you’ve mastered the basics of hydroponic seed starting, there are several advanced techniques you can implement to improve your results and streamline your process.
Using CO2 Enrichment
Carbon dioxide (CO2) is essential for photosynthesis, and increasing the CO2 levels in your growing environment can significantly boost plant growth.
Five Recommendations:
1. Invest in a CO2 Generator: For larger setups, a CO2 generator can help maintain optimal CO2 levels for plant growth. These systems can be expensive, but they offer precise control over CO2 concentrations.
2. Use CO2 Enrichment During the Light Cycle: Plants only use CO2 during photosynthesis, so only enrich CO2 levels when the lights are on.
3. Monitor CO2 Levels: Use a CO2 monitor to ensure levels stay between 1,000-1,500 ppm. Too much CO2 can be harmful to both plants and humans.
4. Seal Your Growing Area: To make the most of CO2 enrichment, seal your growing area to prevent CO2 from escaping and to maintain higher concentrations.
5. Combine with Adequate Ventilation: While CO2 is important, so is oxygen. Ensure your system has good air circulation to provide fresh air when CO2 enrichment is not in use.
Automating Your Hydroponic System
Automation can greatly enhance the efficiency and reliability of your hydroponic system, especially as your garden grows larger.
Five Recommendations:
1. Use Timers for Lights and Pumps: Automate your light cycles and watering schedules with timers to ensure consistency and reduce manual labor.
2. Install a pH and EC Monitor: Automated pH and EC monitors can keep track of nutrient solution levels and make adjustments as needed, reducing the need for constant manual testing.
3. Consider an Automatic Feeder: Automatic feeders can dispense the right amount of nutrients at set intervals, ensuring your plants receive consistent nourishment.
4. Implement an Irrigation Controller: For larger systems, an irrigation controller can manage multiple water lines and schedules, optimizing water usage across different zones.
5. Use Remote Monitoring: Set up a remote monitoring system that allows you to check on your hydroponic system from your phone or computer, making it easier to manage your garden even when you’re away.
Scaling Up Your Hydroponic Operation
If you’re ready to take your hydroponic seed starting to the next level, scaling up your operation requires careful planning and investment.
Five Recommendations:
1. Expand Your Space: Consider dedicating a larger area, such as a greenhouse or an unused room, to your hydroponic setup to accommodate more plants.
2. Increase Your System’s Capacity: Upgrade your hydroponic system to handle more plants, including adding more trays, larger reservoirs, and additional lighting.
3. Invest in Commercial-Grade Equipment: As you scale up, consider investing in commercial-grade pumps, lights, and nutrient delivery systems to handle the increased demands.
4. Hire Help: If your operation grows large enough, consider hiring assistance to manage daily tasks like monitoring, feeding, and pest control.
5. Market Your Produce: If you’re growing more than you can use, explore opportunities to sell your produce at local markets, restaurants, or through community-supported agriculture (CSA) programs.
Conclusion
Hydroponic seed starting is a fascinating and efficient way to begin your gardening journey. With the right equipment, knowledge, and techniques, you can grow strong, healthy seedlings that are ready to thrive in a hydroponic system or soil. Whether you’re a beginner just getting started or an experienced grower looking to optimize your setup, the tips and recommendations provided in this guide will help you achieve success. Remember, patience
and attention to detail are key to nurturing your hydroponic garden. The more you learn and experiment, the more confident you’ll become in your ability to grow robust plants from seed. With time, you’ll develop a deep understanding of how to fine-tune your system to meet the specific needs of your plants, leading to bountiful harvests.
FAQs About Hydroponic Seed Starting
To wrap up, here are some frequently asked questions about hydroponic seed starting that might help clarify any lingering doubts.
1. Can any seed be started hydroponically?
While most seeds can be started hydroponically, some plants are better suited to this method than others. Leafy greens, herbs, and certain fruits like tomatoes and peppers thrive in hydroponic systems. However, root vegetables and plants that require a lot of space, such as corn, might not be ideal for hydroponics. Always consider the final size and needs of the plant before choosing seeds for hydroponic starting.
2. How long does it take for seeds to germinate in a hydroponic system?
The germination time for seeds in a hydroponic system varies depending on the type of plant and the conditions of your system. Generally, you can expect most seeds to germinate within 3 to 10 days. Factors like temperature, light, humidity, and the type of growing medium you use can all affect the germination rate.
3. Do I need special seeds for hydroponics?
No, you do not need special seeds for hydroponics. You can use any high-quality, viable seeds for starting your hydroponic garden. However, it’s important to choose seeds that are suited to the conditions of your hydroponic system. Some companies do offer seeds specifically marketed for hydroponics, but these are not necessary to achieve good results.
4. What are the most common mistakes when starting seeds hydroponically?
Common mistakes include using a nutrient solution that is too strong, not monitoring pH levels, poor light management, and overwatering. Each of these can lead to poor seed germination and weak seedlings. Another common mistake is overcrowding seeds in the trays, which can lead to competition for light and nutrients, resulting in weaker plants.
5. How do I know when my seedlings are ready to be transplanted?
Your seedlings are ready to be transplanted when they have at least two sets of true leaves and a well-established root system. The plants should also be sturdy and able to stand on their own. Transplanting too early can shock the seedlings, while waiting too long can cause them to become root-bound, which can stunt their growth.
Final Thoughts
Starting seeds hydroponically is a rewarding process that, with some practice, can become second nature. The key is to start small, focus on learning the fundamentals, and gradually experiment with more complex techniques as your confidence grows. By following the recommendations and steps laid out in this guide, you’ll be well on your way to cultivating a thriving hydroponic garden from seed. Happy growing!
*We may earn a commission from purchases made through our links, at no cost to you. This does not affect our product recommendations. Please see our disclosure to learn more.